How to Prepare Your Walls Before Painting: A Step-by-Step Guide

Here's a truth that every professional painter knows: preparation is 80% of a good paint job. The actual painting is the easy part.
If you've ever seen paint peeling, bubbling, or flaking off a wall within months, poor preparation is almost always the cause — not the paint itself. Whether you're painting a brand-new building or repainting old walls, this guide covers everything you need to know.
Why Wall Preparation Matters
Paint needs a clean, dry, smooth, and stable surface to adhere properly. Without preparation:
- New block walls absorb paint unevenly, wasting product and creating a patchy finish
- Old painted walls with flaking paint cause new paint to peel off with the old layers
- Damp walls cause blistering and mould growth under the new paint
- Dusty walls prevent proper adhesion — the paint bonds to dust, not the wall
Spending an extra day on preparation can mean the difference between a paint job that lasts 2 years and one that lasts 7+ years.
Tools and Materials You'll Need
| Item | Purpose |
|---|---|
| Wire brush or scraper | Remove flaking old paint |
| Sandpaper (80, 120, 240 grit) | Smooth surfaces and key glossy areas |
| Filler / Wall putty | Fill cracks, holes, and imperfections |
| Putty knife / Filling knife | Apply and smooth filler |
| Clean water + sponge | Wash walls to remove dust and dirt |
| Masking tape | Protect edges, switches, and door frames |
| Drop cloths / nylon sheeting | Protect floors and furniture |
| Primer / Undercoat | Seal surface before topcoat |
Preparing New Block Walls (Unpainted)
New block walls fresh from the builder require specific preparation:
Step 1: Allow Proper Curing Time
New cement/mortar must cure for at least 4–6 weeks before painting. Fresh cement is alkaline and contains moisture that will cause paint to fail.
In a rush? If you must paint sooner, use a specialised alkali-resistant primer that can handle residual moisture.
Step 2: Remove Surface Deposits
New walls often have:
- Efflorescence — white powdery salt deposits
- Cement splashes — lumps from the building process
- Dust and sand from construction
Use a wire brush to scrub off efflorescence and a scraper for cement lumps. Then sweep or blow off all loose dust.
Step 3: Wash the Walls
Wash walls with clean water using a sponge. This removes fine dust that brushing missed. Allow walls to dry completely (24–48 hours in Nigerian weather).
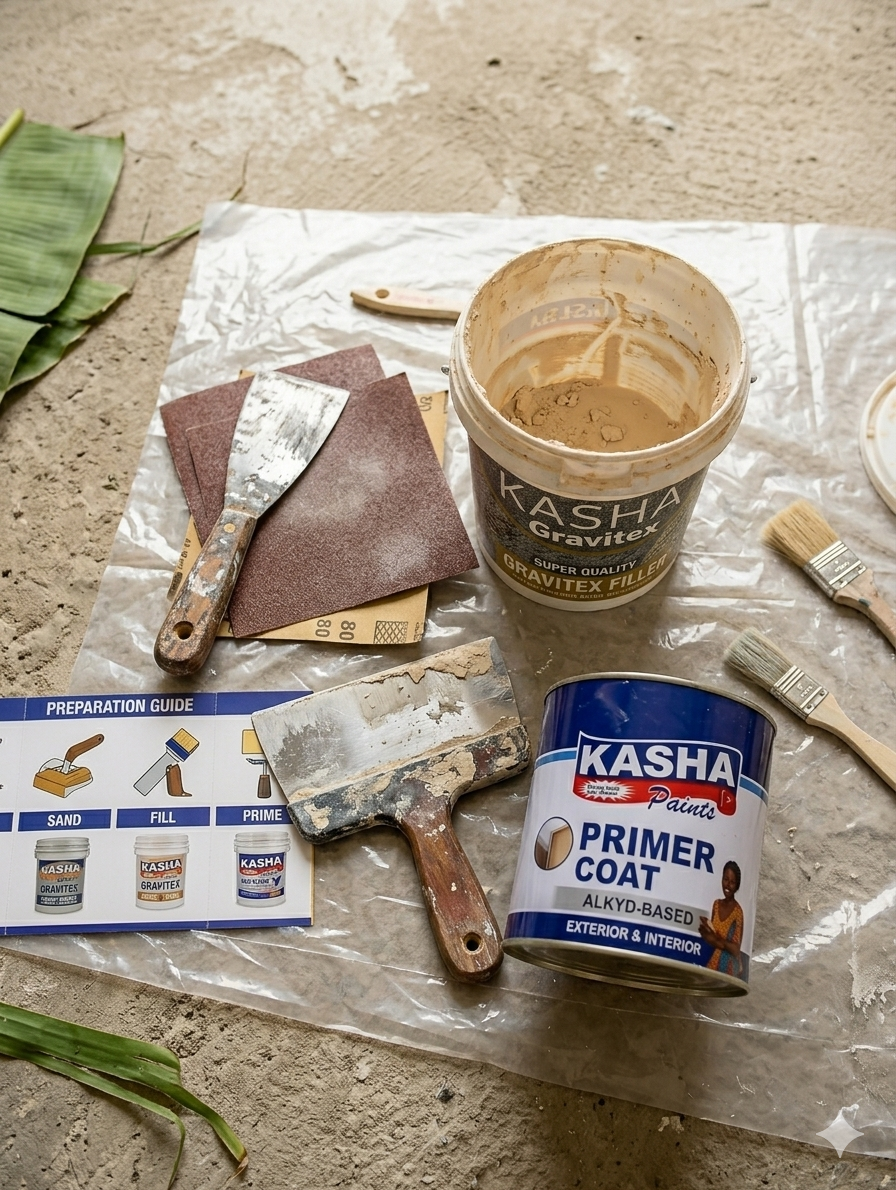
Step 4: Apply Filler Where Needed
Inspect for:
- Cracks along block joints
- Holes from scaffolding nails
- Uneven rendering
Mix wall filler according to instructions and apply with a putty knife. Overfill slightly — you'll sand it smooth once dry.
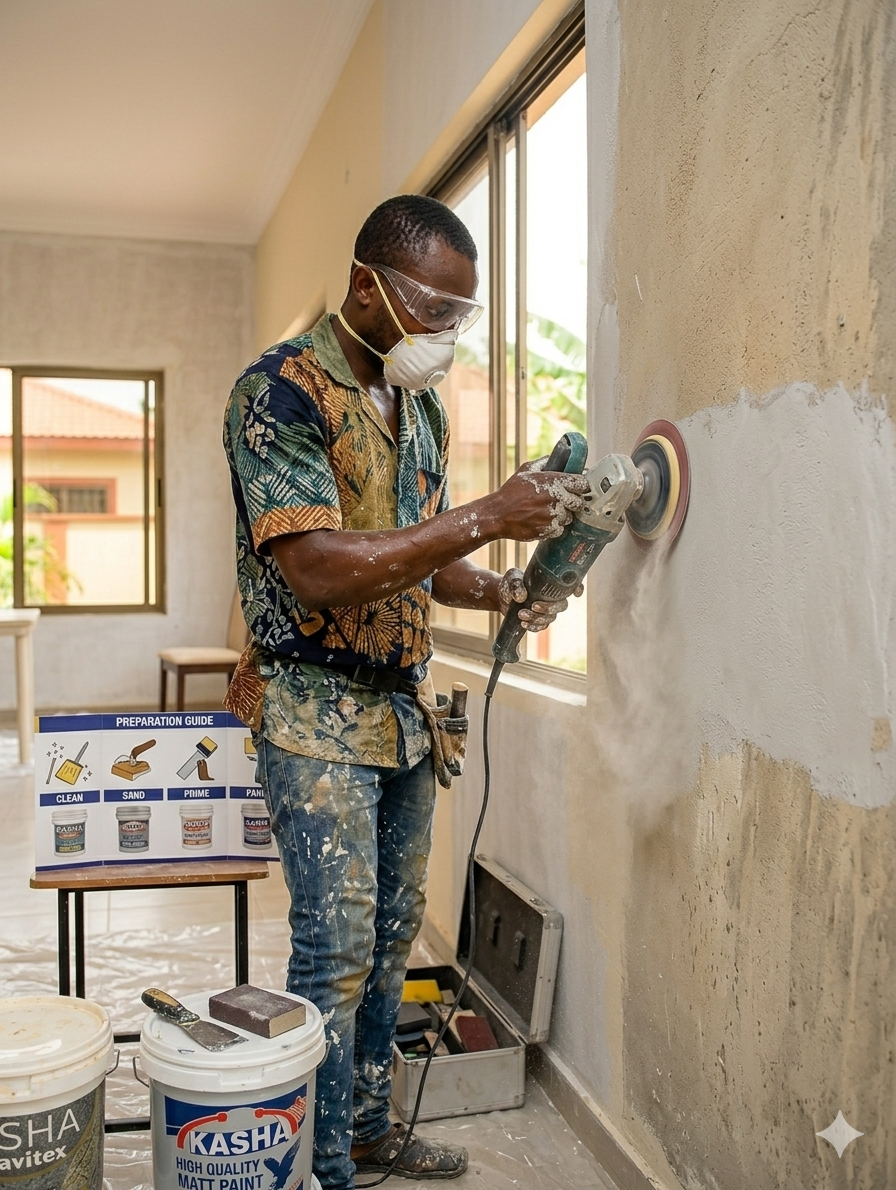
Step 5: Sand Smooth
Once filler is dry (2–4 hours), sand the filled areas smooth with 120-grit sandpaper. Lightly sand the entire wall to create a uniform surface. Wipe off dust with a damp cloth.
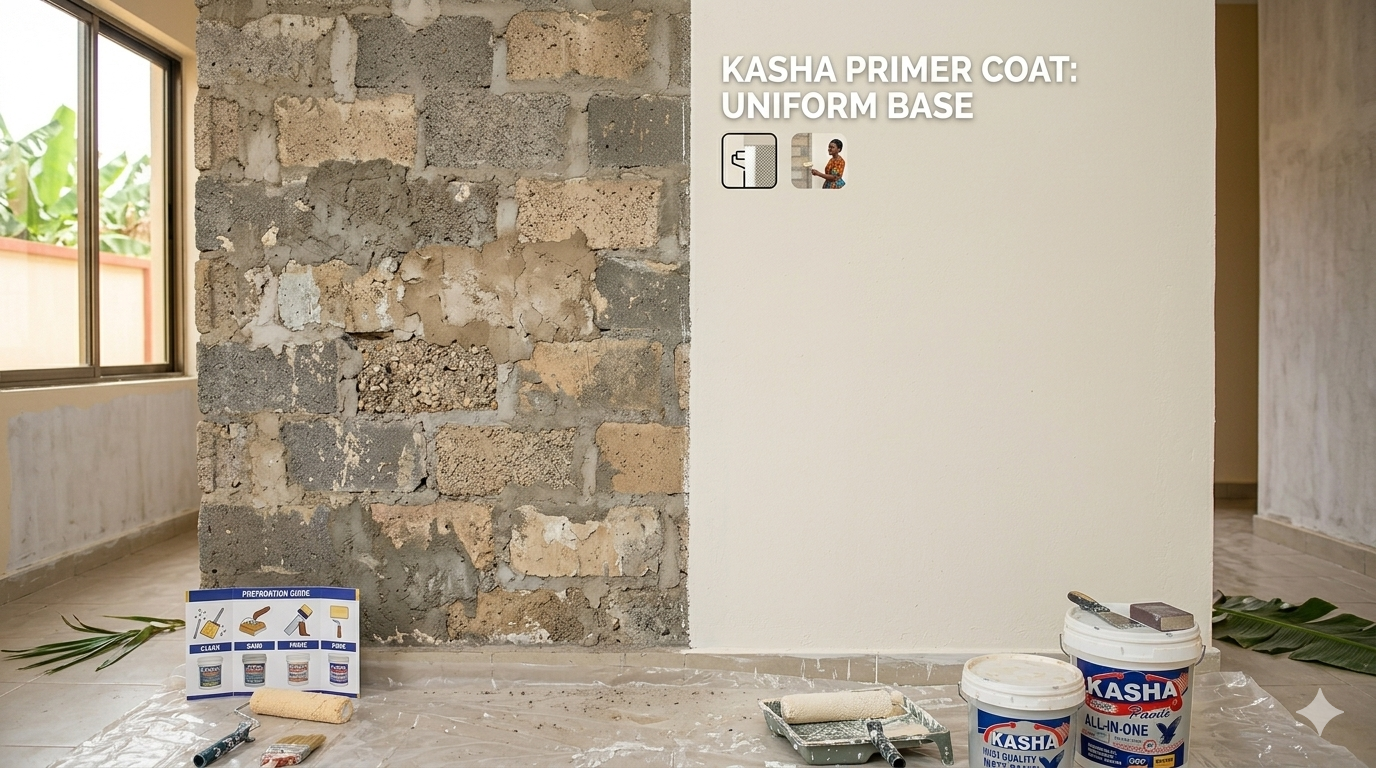
Step 6: Apply Primer
This is the most important step. Primer:
- Seals the porous surface
- Reduces paint consumption by 30–40%
- Provides a uniform base for even colour coverage
- Improves adhesion of the topcoat
Apply one generous coat of Kasha Universal Primer and allow to dry fully (4–6 hours).
Step 7: Paint!
Once the primer is dry, your wall is ready for topcoat application.
Preparing Old Painted Walls (Repaint)
Repainting requires extra steps to deal with the existing paint layer:
Step 1: Assess the Existing Paint
- Is it in good condition? (no peeling, no cracks) → Light sand, clean, and paint over it
- Is it flaking/peeling? → Remove all loose paint back to a stable surface
- Is it glossy? → Must be sanded to provide a key for new paint
Step 2: Remove Loose and Flaking Paint
Use a scraper or wire brush to remove all paint that's lifting, bubbling, or flaking. Be thorough — if you paint over loose paint, it will all come off together.
Step 3: Sand the Edges
Where old paint meets bare wall, sand the edges to create a smooth, gradual transition. This prevents visible "lips" showing through the new paint.
Step 4: Wash the Walls
Wash with water and a mild detergent (or sugar soap if available). This removes:
- Grease and cooking oil residue (especially in kitchens)
- Dirt and handprints
- Cobwebs and dust
Rinse with clean water and allow to dry completely.
Step 5: Fill and Repair
Fill any cracks, nail holes, or damaged areas with wall filler. Sand smooth once dry.
Step 6: Spot-Prime Bare Areas
Any area where you've scraped back to bare wall needs a coat of primer. You don't need to prime the entire wall if the existing paint is in good condition — just the bare patches.
Step 7: Apply Your Topcoat
Start painting with your chosen emulsion. Two coats for best results.
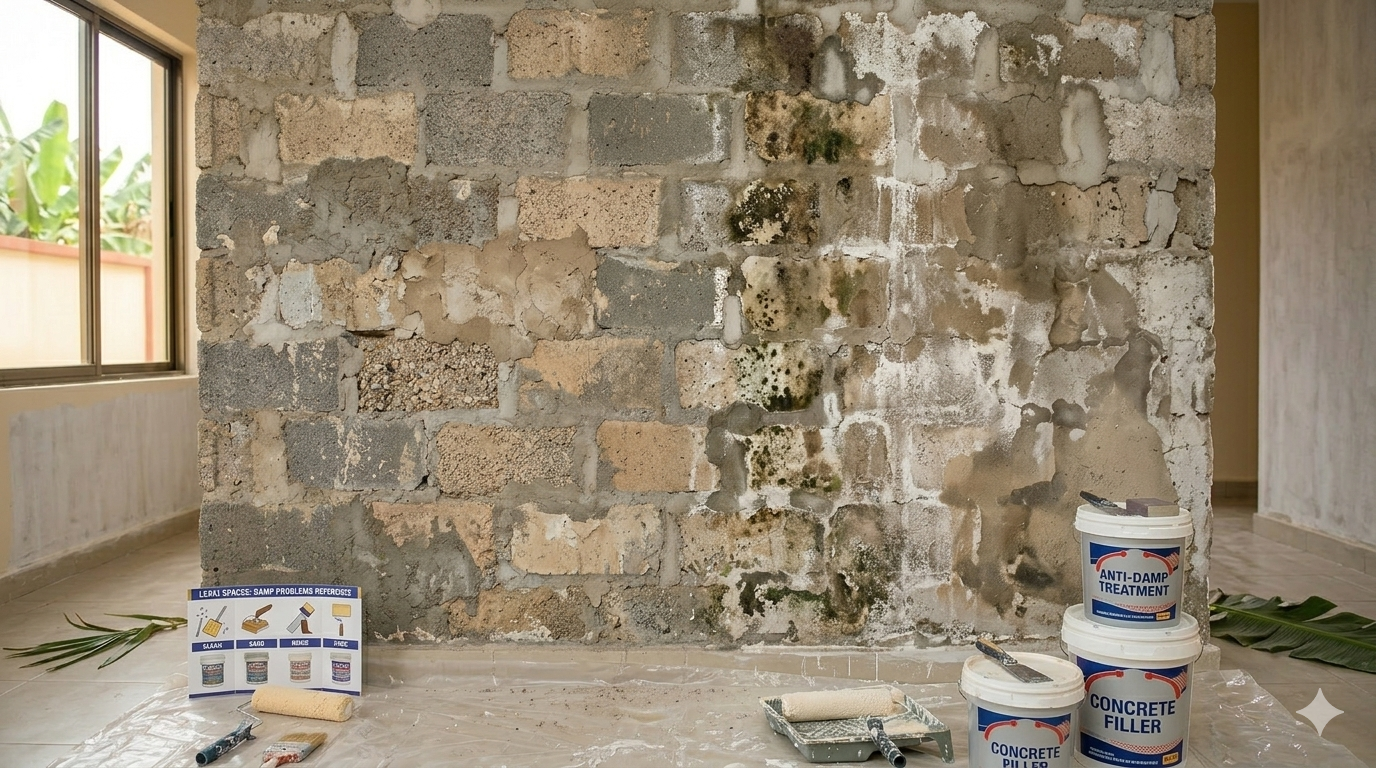
Dealing with Damp and Mould
Damp walls are the number one enemy of paint in Nigeria's humid climate. Never paint over damp walls — the paint will blister and peel, and mould will grow behind it.
Identifying Damp
- Dark patches on walls
- White salt deposits (efflorescence)
- Musty smell
- Visible mould (black or green spots)
- Paint bubbling or peeling
How to Fix Damp Before Painting
1. Find and fix the source:
- Leaking pipes behind walls
- Rising damp from the floor (no damp-proof course)
- Rain penetration through cracks or failed exterior paint
- Condensation from poor ventilation
2. Treat the affected area:
- Scrape off all affected paint and loose plaster
- Apply an anti-mould wash or diluted bleach solution (1 part bleach to 3 parts water)
- Let it sit for 30 minutes, then scrub with a stiff brush
- Rinse with clean water and allow to dry completely (several days if badly affected)
3. Apply a damp-seal primer before repainting
Warning: If the source of damp isn't fixed, no amount of paint or treatment will solve the problem. Fix the leak/drainage issue first.
Common Preparation Mistakes
1. Painting Over Dust
Even a thin layer of dust prevents paint from bonding to the wall. Always wash walls before painting.
2. Painting Too Soon After Plastering
Fresh plaster/rendering contains moisture and is highly alkaline. Give it 4–6 weeks minimum. Painting too soon causes white patches, blistering, and peeling.
3. Using No Primer
Skipping primer on new walls means:
- The first coat of paint is essentially the primer (wasted)
- Uneven absorption creates patchy colour
- Overall you'll need more paint, costing more in total
4. Ignoring Cracks
Paint doesn't fill or hide cracks — it stretches over them temporarily, then the cracks reappear. Fill them properly with putty.
5. Painting in High Humidity or Rain
If it's raining or humidity is extremely high, paint dries too slowly and may not cure properly. Paint on dry days.
Quick Reference: Preparation Checklist
- [ ] Surface is dry (no damp, no recent rain)
- [ ] All loose/flaking paint removed
- [ ] Cracks and holes filled and sanded
- [ ] Surface washed and dust-free
- [ ] Edges and fixtures masked with tape
- [ ] Floor/furniture protected with drop cloths
- [ ] Primer applied on bare/new surfaces
- [ ] Primer fully dry before topcoat
Get Professional Help
Not sure about the condition of your walls? At Kasha Paints, we offer professional painting services — including full wall preparation.
- View our products — including Kasha Universal Primer
- Get a free quote — we'll assess your walls and recommend the right approach
- Chat on WhatsApp — send us a photo of your walls for quick advice
Kasha Paints — Giving value to your money.